
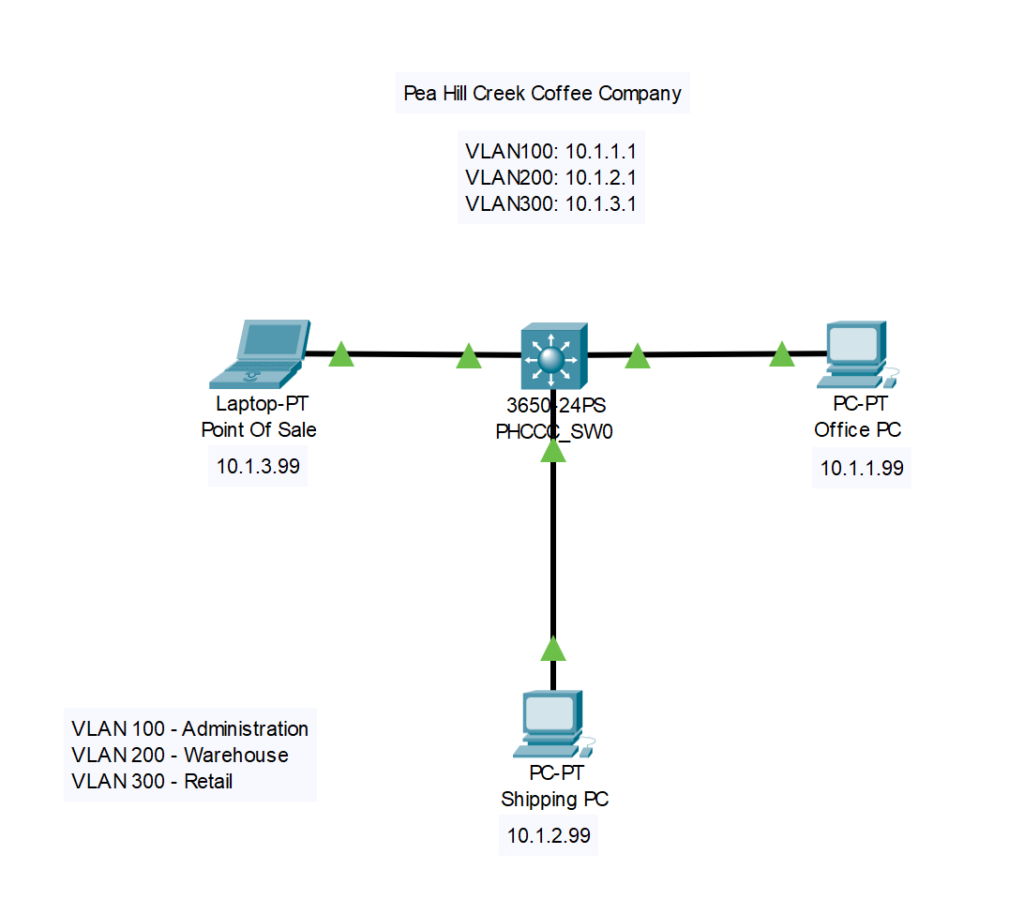
Since the last project, Pea Hill Creek Coffee Company has aquired a new switch for it’s network. The old switch, a Cisco 2960 was a Layer 2 switch, which means it did not have any routing capablities, and only had Fast Ethernet interfaces. The new switch, a Cisco Catalyst 3650 is a Layer 3 switch, which means it has routing capablities, and Gigabit interfaces. Upgrading this switch will give us more throughput on our LAN and eliminate the need for the “Router on a Stick”. This should be a fairly straight forward upgrade, so let’s get right to it!
1) First we have powered up our switch and answered “No” to the initial configuration dialog. We want to configure everything by hand.
 --- System Configuration Dialog ---

Would you like to enter the initial configuration dialog? [yes/no]: no


Press RETURN to get started!


Switch>
2) Let’s move to Global Configuration mode and set the hostname.
Switch>enable
Switch#configure terminal
Enter configuration commands, one per line.  End with CNTL/Z.
Switch(config)#hostname PHCCC_SW0
PHCCC_SW0(config)#end
PHCCC_SW0#
3) Now let’s configure our VLANs.
PHCCC_SW0#configure terminal
Enter configuration commands, one per line.  End with CNTL/Z.
PHCCC_SW0(config)#vlan 100
PHCCC_SW0(config-vlan)#name ADMINISTRATION
PHCCC_SW0(config-vlan)#vlan 200
PHCCC_SW0(config-vlan)#name WAREHOUSE
PHCCC_SW0(config-vlan)#vlan 300
PHCCC_SW0(config-vlan)#name RETAIL
PHCCC_SW0(config-vlan)#end
PHCCC_SW0#
4) For the final step on Layer 2, we will assign interfaces to the VLANs. Just like before, we’re going to assign 4 interfaces per VLAN.
PHCCC_SW0#configure terminal
Enter configuration commands, one per line.  End with CNTL/Z.
PHCCC_SW0(config)#interface range gi1/0/4 - 7
PHCCC_SW0(config-if-range)#switchport access vlan 100
PHCCC_SW0(config-if-range)#switchport mode access
PHCCC_SW0(config-if-range)#interface range gi1/0/8 - 11
PHCCC_SW0(config-if-range)#switchport access vlan 200
PHCCC_SW0(config-if-range)#switchport mode access
PHCCC_SW0(config-if-range)#interface range gi1/0/12 - 15
PHCCC_SW0(config-if-range)#switchport access vlan 300
PHCCC_SW0(config-if-range)#switchport mode access
PHCCC_SW0(config-if-range)#end
PHCCC_SW0#


PHCCC_SW0#show vlan

VLAN Name                             Status    Ports
---- -------------------------------- --------- -------------------------------
1    default                          active    Gig1/0/1, Gig1/0/2, Gig1/0/3, Gig1/0/16
                                                Gig1/0/17, Gig1/0/18, Gig1/0/19, Gig1/0/20
                                                Gig1/0/21, Gig1/0/22, Gig1/0/23, Gig1/0/24
                                                Gig1/1/1, Gig1/1/2, Gig1/1/3, Gig1/1/4
100  ADMINISTRATION                   active    Gig1/0/4, Gig1/0/5, Gig1/0/6, Gig1/0/7
200  WAREHOUSE                        active    Gig1/0/8, Gig1/0/9, Gig1/0/10, Gig1/0/11
300  RETAIL                           active    Gig1/0/12, Gig1/0/13, Gig1/0/14, Gig1/0/15
1002 fddi-default                     active
1003 token-ring-default               active
1004 fddinet-default                  active
1005 trnet-default                    active

VLAN Type  SAID       MTU   Parent RingNo BridgeNo Stp  BrdgMode Trans1 Trans2
---- ----- ---------- ----- ------ ------ -------- ---- -------- ------ ------
1    enet  100001     1500  -      -      -        -    -        0      0
100  enet  100100     1500  -      -      -        -    -        0      0
200  enet  100200     1500  -      -      -        -    -        0      0
300  enet  100300     1500  -      -      -        -    -        0      0
1002 fddi  101002     1500  -      -      -        -    -        0      0
1003 tr    101003     1500  -      -      -        -    -        0      0
1004 fdnet 101004     1500  -      -      -        ieee -        0      0
1005 trnet 101005     1500  -      -      -        ibm  -        0      0

VLAN Type  SAID       MTU   Parent RingNo BridgeNo Stp  BrdgMode Trans1 Trans2
---- ----- ---------- ----- ------ ------ -------- ---- -------- ------ ------

Remote SPAN VLANs
------------------------------------------------------------------------------

Primary Secondary Type              Ports
------- --------- ----------------- ------------------------------------------
PHCCC_SW0#
5) Now, let’s configure the Layer 3, or routing functions on the switch.
PHCCC_SW0#conf t
Enter configuration commands, one per line.  End with CNTL/Z.
PHCCC_SW0(config)#interface vlan 100
PHCCC_SW0(config-if)#
%LINK-5-CHANGED: Interface Vlan100, changed state to up
ip address 10.1.1.1 255.255.255.0
PHCCC_SW0(config-if)#description ADMINISTRATION
PHCCC_SW0(config-if)#interface vlan 200
PHCCC_SW0(config-if)#
%LINK-5-CHANGED: Interface Vlan200, changed state to up
ip address 10.1.2.1 255.255.255.0
PHCCC_SW0(config-if)#description WAREHOUSE
PHCCC_SW0(config-if)#interface vlan 300
PHCCC_SW0(config-if)#
%LINK-5-CHANGED: Interface Vlan300, changed state to up
ip address 10.1.3.1 255.255.255.0
PHCCC_SW0(config-if)#description RETAIL
PHCCC_SW0(config-if)#end
PHCCC_SW0#

PHCCC_SW0#sh ip interface brief
Interface              IP-Address      OK? Method Status                Protocol
GigabitEthernet1/0/1   unassigned      YES unset  down                  down
GigabitEthernet1/0/2   unassigned      YES unset  down                  down
GigabitEthernet1/0/3   unassigned      YES unset  down                  down
GigabitEthernet1/0/4   unassigned      YES unset  up                    up
GigabitEthernet1/0/5   unassigned      YES unset  down                  down
GigabitEthernet1/0/6   unassigned      YES unset  down                  down
GigabitEthernet1/0/7   unassigned      YES unset  down                  down
GigabitEthernet1/0/8   unassigned      YES unset  up                    up
GigabitEthernet1/0/9   unassigned      YES unset  down                  down
GigabitEthernet1/0/10  unassigned      YES unset  down                  down
GigabitEthernet1/0/11  unassigned      YES unset  down                  down
GigabitEthernet1/0/12  unassigned      YES unset  up                    up
GigabitEthernet1/0/13  unassigned      YES unset  down                  down
GigabitEthernet1/0/14  unassigned      YES unset  down                  down
GigabitEthernet1/0/15  unassigned      YES unset  down                  down
GigabitEthernet1/0/16  unassigned      YES unset  down                  down
GigabitEthernet1/0/17  unassigned      YES unset  down                  down
GigabitEthernet1/0/18  unassigned      YES unset  down                  down
GigabitEthernet1/0/19  unassigned      YES unset  down                  down
GigabitEthernet1/0/20  unassigned      YES unset  down                  down
GigabitEthernet1/0/21  unassigned      YES unset  down                  down
GigabitEthernet1/0/22  unassigned      YES unset  down                  down
GigabitEthernet1/0/23  unassigned      YES unset  down                  down
GigabitEthernet1/0/24  unassigned      YES unset  down                  down
GigabitEthernet1/1/1   unassigned      YES unset  down                  down
GigabitEthernet1/1/2   unassigned      YES unset  down                  down
GigabitEthernet1/1/3   unassigned      YES unset  down                  down
GigabitEthernet1/1/4   unassigned      YES unset  down                  down
Vlan1                  unassigned      YES unset  administratively down down
Vlan100                10.1.1.1        YES manual up                    up
Vlan200                10.1.2.1        YES manual up                    up
Vlan300                10.1.3.1        YES manual up                    up
PHCCC_SW0#
6) One easy to skip step, enable routing on the Layer 3 switch.
PHCCC_SW0#configure terminal
PHCCC_SW0(config)#ip routing
PHCCC_SW0(config)#end
PHCCC_SW0#
7) Now let’s save our work and put it into production.
PHCCC_SW0#
PHCCC_SW0#copy running-config startup-config
Destination filename [startup-config]?
Building configuration...
[OK]
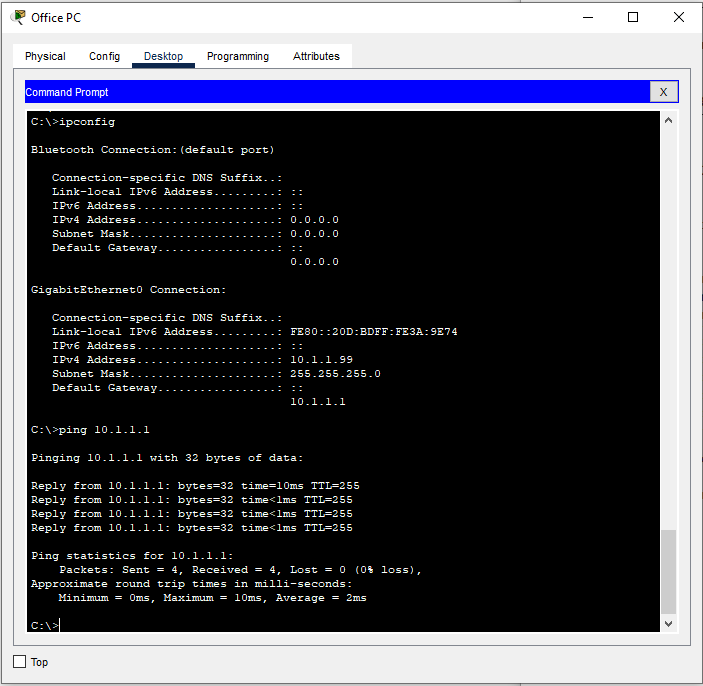
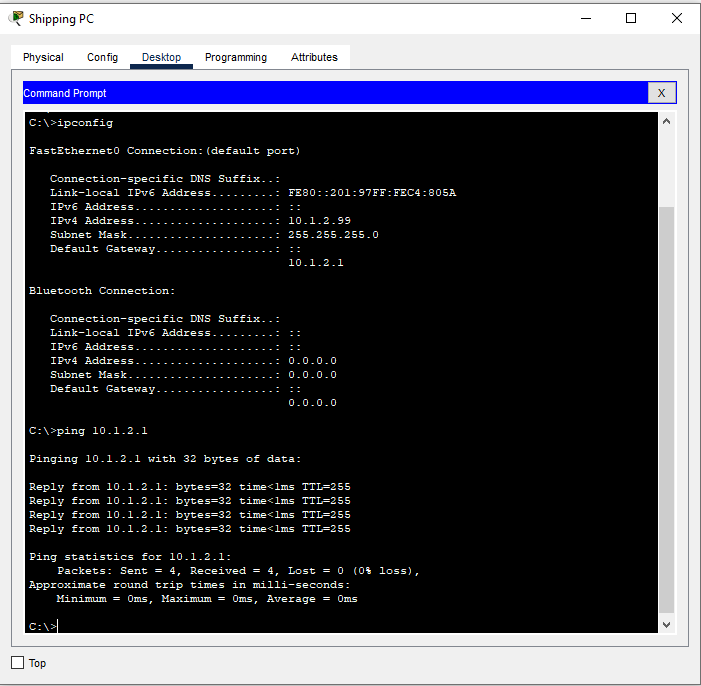
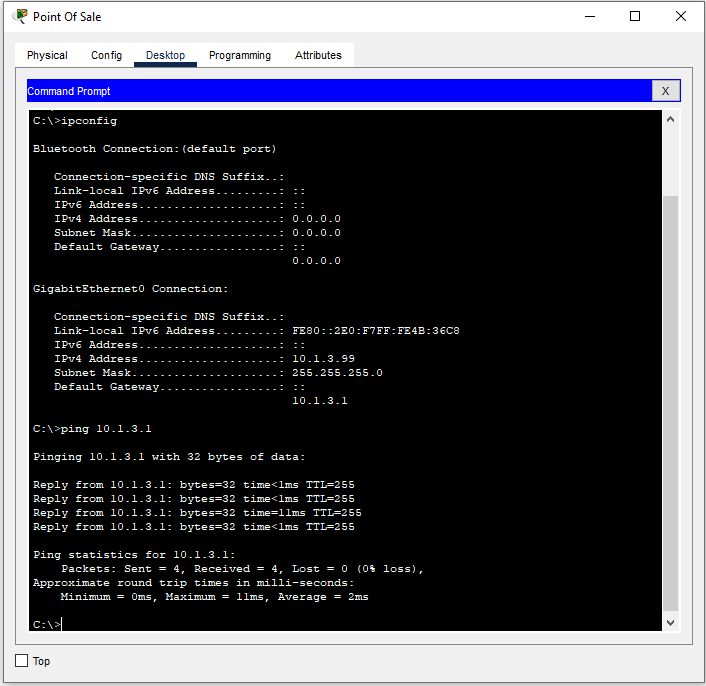
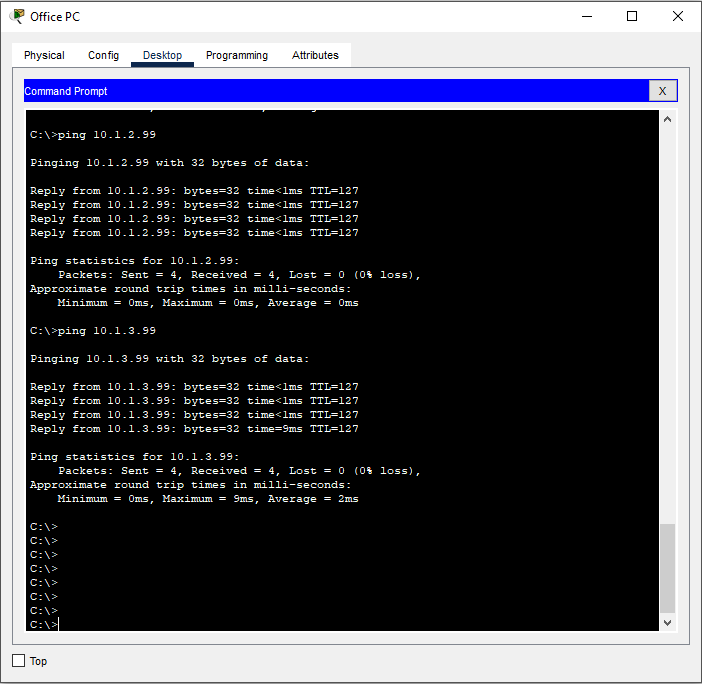
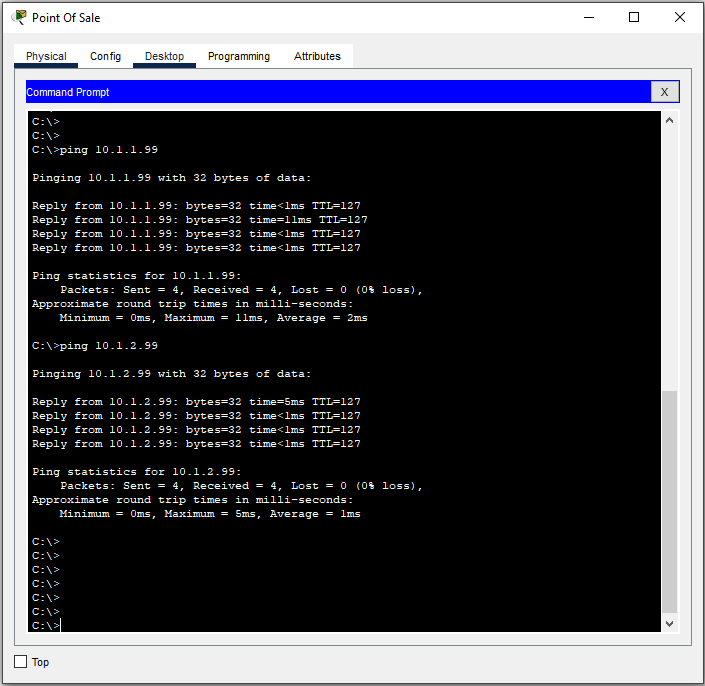
PHCCC_SW0#9) Finally, let’s test connectivity via PING.

Next Post Coming Soon!